.webp)

The Time-Crunched Cyclist: How To Actually Get Faster On 5 Hours A Week
The research on polarized and high-intensity training says the opposite: 5 well-built hours beats 10 sloppy ones, every time.
Stop guessing and start decoding: this guide shows how to read pain patterns, measure sit bones, match saddle shape to your riding style, and fine-tune setup so you can find a saddle that actually fits your body.
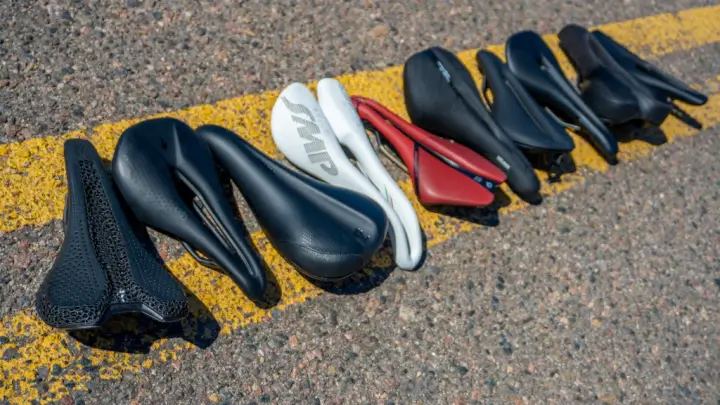
Finding the right bike saddle is less like shopping and more like decoding a very personal puzzle. Two riders can sit on the same seat and have completely opposite experiences. One calls it “perfect.” The other wants to throw it into a river after 10 kilometers.

That’s because saddle comfort isn’t universal. It’s anatomical. It’s positional. It’s behavioral. And most importantly, it’s specific to you.
If you’re dealing with discomfort, numbness, or full-on pain, this guide will help you move from guessing to understanding what saddle is best for you.
Before chasing the “perfect saddle,” take a closer look at your current one. It’s already giving you valuable feedback, you just need to read it properly.
Go for a short ride and pay attention to what’s happening in your body:
This is about pattern recognition, not overanalyzing. Your discomfort is a map, and every hotspot is a clue.
Most riders skip this step and jump straight into buying something new. That’s how you end up in a loop of expensive trial and error.
Different types of discomfort usually point to different saddle issues. Once you understand the signal, you can adjust the shape, width, or setup instead of blindly swapping models.
Pain near the nose of the saddle is often linked to positioning rather than the saddle itself.
A slightly upward tilt can push pressure forward into sensitive areas. Adjusting the angle just a few degrees downward can make a significant difference.
But shape matters too.
If the saddle nose feels intrusive or rubs your thighs:
In this case, a shorter saddle or one with a narrower nose can help. Some saddles also feature a downward-curving nose, which reduces pressure in that area.
The goal here is simple: the front of the saddle should support, not interfere.
This is one of the most common issues riders face, especially on longer rides or in aggressive positions.
If you’re feeling pressure or numbness in soft tissue areas, your saddle likely isn’t distributing weight properly.
This is where channels and cut-outs come in.
Which one you need depends on intensity.
If the discomfort is mild, a channel may be enough. If it’s persistent or includes numbness, a full cut-out is usually the better option.
Your riding position also plays a role. The more aggressive and forward-leaning your posture, the more pressure shifts to the center, making pressure relief features more important.
Some riders also find relief by making very small adjustments to saddle position. Even shifting it slightly left or right. The body isn’t perfectly symmetrical, and sometimes your saddle shouldn’t be either.
Pain at the back of the saddle usually points to one key issue: width.
Your sit bones (the bony structures at the base of your pelvis) are meant to carry your weight. If the saddle is too narrow, those bones aren’t properly supported, and pressure spreads into soft tissue.
If the saddle is too wide, you may experience chafing or restricted movement.
Finding the right width is critical. This is where many riders go wrong.
It sounds technical, but it’s surprisingly simple, and one of the most useful things you can do.
You don’t need fancy equipment.
Here’s a DIY method:
That final number is your ideal saddle width range.
Many bike shops offer professional measurement tools, but this DIY method works well enough to guide your decision.
Once your saddle matches your sit bone width, a lot of discomfort simply disappears. Not instantly, but noticeably.
One of the biggest myths in cycling is that more padding equals more comfort.
In reality, excessive padding can make things worse.
Soft saddles compress under your weight, which can increase pressure on soft tissue and create instability. This leads to friction, heat, and eventually discomfort.
A well-shaped saddle with moderate padding is almost always more comfortable than a heavily cushioned one.
Think structure over softness.
Your position on the bike changes everything.
If your saddle doesn’t match your riding style, it will never feel right, no matter how expensive it is.
Before replacing your saddle, experiment with adjustments.
Even minor changes can completely transform how a saddle feels:
These tweaks affect how your weight is distributed and how your body interacts with the saddle.
Many riders blame the saddle when the real issue is setup.
If there’s one rule worth following, it’s this: never commit to a saddle you haven’t tested.
Many local bike shops offer test saddle programs. You leave a deposit, ride the saddle for a week or two, and either keep it or swap it.
This is the closest thing to a “fitting room” in cycling.
Because no matter how many reviews you read, your body is the final judge.
Perfect for the new riders!
No spam. Cancel anytime.


