
How Tour De France Riders Actually Pee At 45 KM/H: The Peloton's Dirtiest Open Secret
Riders drink up to 12 bottles of fluid per stage, race for over five hours, and never truly stop.
There is a distinct difference between a cyclist and someone who just rides a bike: self-sufficiency. This comprehensive guide outlines exactly what you need to carry to handle common roadside mechanicals and physiological bonks, complete with gear recommendations to ensure you finish every ride under your own power.
The freedom of a bicycle ride is intoxicating. It’s just you, two wheels, and the open road or trail.
The rhythmic cadence of pedaling washes away stress, and the miles tick by effortlessly. The world shrinks down to the patch of asphalt or dirt directly in front of you, and for a moment, life is simple.
Until it isn't.
There is a sickening sound every cyclist knows: the sudden hiss of escaping air, the metallic crunch of a chain snapping, or the silent, creeping realization that your legs have completely run out of energy ten miles from home.
At that moment, the romanticism of the ride evaporates, replaced by the cold, logistical reality of being stranded.
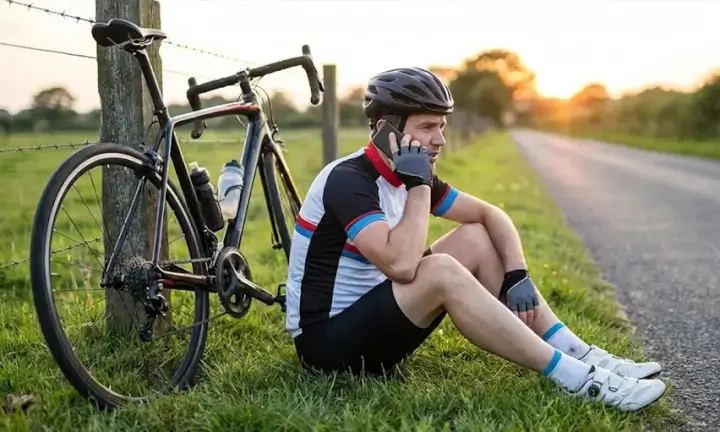
If you are unprepared, this is when you are forced to make the "shame call" phoning a partner, parent, or friend to interrupt their day, drive out to the middle of nowhere, and rescue you.
It’s humbling, inconvenient for others, and entirely preventable.
The mark of a seasoned cyclist isn't how fast they ride or how expensive their bike is, but their ability to handle the inevitable hiccups of the sport independently.
Developing a standardized "ride kit" isn't about paranoia; it's about buying peace of mind.
When you know you have the tools and knowledge to fix a flat in five minutes or repair a broken chain on the roadside, you ride with greater confidence and venture further.
Below is the definitive guide to the essentials every rider should carry to ensure they always make it home on two wheels.
The vast majority of roadside stoppages likely over 90% are caused by tires.
Whether it's a thorn, a shard of glass, a pinch flat from a hidden pothole, or a slice from road debris, if you ride long enough, you will get a flat.
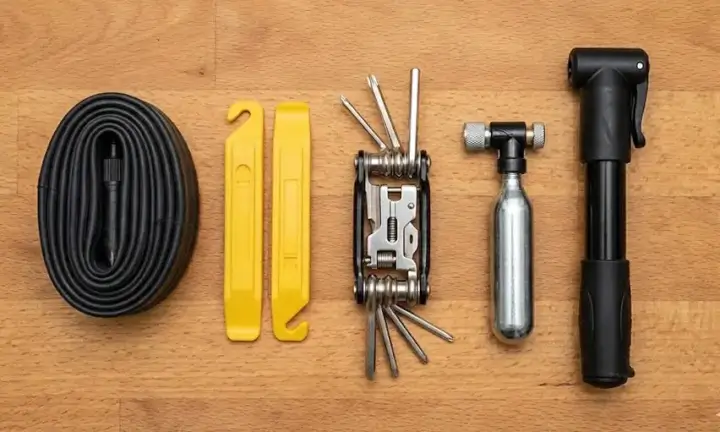
Being unable to fix one is the most common reason for the rescue call. Your tire repair kit is non-negotiable and should be the first thing you pack.
If you ride with standard clincher tires (tires that use inner tubes), carrying one Spare Bicycle Inner Tube is the absolute minimum; carrying two is smart.
If you get a flat five miles into a fifty-mile ride and use your only spare, the rest of the ride becomes a high-stakes gamble where one more piece of glass leaves you walking.
When packing spares, ensure they are the correct size for your wheels (700c for road, 29" or 27.5" for MTB) and have the right valve type (Presta or Schrader) and valve length for your rims.
Recently, many riders have switched to lightweight TPU tubes (Thermoplastic Polyurethane).
These are significantly lighter and more compact than traditional black rubber butyl tubes, making it easier to carry two spares in a tiny bag.
For those running tubeless setups, the game changes. While liquid sealant handles small punctures, larger cuts require manual intervention.
A Tubeless Repair Kit (often called "bacon strips" or "darts") is essential. These sticky rubber plugs jam into the hole to seal it externally.
Crucially, even tubeless riders should carry one emergency spare tube. If a tire gets slashed beyond what a plug can fix, putting a tube inside is your only way home.
Trying to pry a tight road tire off a rim using your thumbs is a recipe for blistered thumbs and extreme frustration.
Trying to use a screwdriver or house key will destroy your expensive rim tape or carbon wheel structure.
Tire Levers are inexpensive, lightweight plastic tools designed specifically to hook under the tire bead and leverage it off the rim without damage.
Never use metal tire levers on modern bikes, especially if you have carbon fiber rims, as they can permanently damage the wheel structure.
Quality plastic or composite levers (like those from Park Tool or Pedro's) are strong enough for the job and safe for your equipment.
You generally need a set of two or three to remove a stubborn tire.
Once the tube is replaced or the plug is set, you need air. You have two main choices: a manual mini-pump or a CO2 inflator.
A Mini-Pump is the reliable workhorse. It never runs out of air.
It takes effort and time pumping a high-pressure road tire to 90 PSI with a tiny hand pump is an upper-body workout in itself but it will always work, as many times as you need it to.
Look for pumps that have a flexible hose attachment; pumps that attach directly to the valve can wiggle while you pump, potentially snapping the delicate valve core.
CO2 Inflators and Cartridges offer instant gratification.
A small nozzle attaches to a pressurized carbon dioxide canister, inflating a tire in seconds with zero effort. However, it is a finite resource. Once you use the cartridge, it's gone.
If you botch the inflation and blast the CO2 into the atmosphere instead of the tire, and you only brought one cartridge, you are walking.
The best practice? Carry both. Use CO2 for the first fast fix to get back to the group ride quickly, and have the mini-pump as the ultimate fail-safe backup.
Bicycles are simple machines, but they vibrate constantly. Bolts loosen, cables stretch, and chains are under immense tension.
A few millimeters of movement in the wrong place can render a bike unrideable. You need a way to tighten things back up.
A bicycle-specific Multitool is the Swiss Army Knife of riding.
You do not need a workshop-quality behemoth with 40 functions, but you do need the essentials to adjust the most common fasteners on your bike.
Your multitool must include:
Before you buy one, look at your specific bike. Does your stem use T25 bolts? Make sure your tool has one. There is nothing worse than carrying a tool that doesn't fit your bike. Brands like Crankbrothers and Topeak make excellent compact versions.
A snapped chain used to be an automatic "ride over" situation. Today, it’s a five-minute fix, if you have the right two items.
First, you need a Chain Breaker Tool.
Often integrated into better multitools, this device pushes the pin out of a chain link, allowing you to remove the damaged section of the chain.
Second, you need a Master Link / Quick Link. This is a two-piece interlocking link that snaps together by hand to reconnect the chain without requiring tools to press a pin back in.
They are specific to the speed of your drivetrain (e.g., you need an 11-speed quick link for an 11-speed chain, a 12-speed for a 12-speed).
They weigh almost nothing tape one to your brake cable housing or keep it in your saddlebag, and it will save your ride one day.
You can have a perfectly functioning $10,000 bicycle, but if the engine (you) runs out of fuel, you aren't going anywhere.
"Bonking" is the cycling term for complete glycogen depletion. It’s not just being hungry; it's a physiological state where your body has exhausted its accessible carbohydrate stores, leading to sudden, severe fatigue, dizziness, and an inability to turn the pedals over.
According to research in sports science, maintaining carbohydrate availability is critical for endurance performance.
A study highlighted in the Journal of Sports Sciences notes that for high-intensity activities lasting longer than an hour, consuming 30-60g of carbohydrates per hour can significantly improve performance and delay fatigue.
The body has limited glycogen stores, and once depleted, your power output drops drastically.
The final category covers items that don't fix the bike, but protect the rider and handle the unexpected.
Your smartphone is your navigation device, your camera, and yes, your emergency lifeline. But GPS apps drain batteries fast.
For very long rides into unfamiliar territory, a small, lightweight stick-style portable power bank and a short charging cable can prevent you from losing navigation mid-ride.
Relying solely on a phone for navigation in remote areas with spotty cell service is risky.
Downloading offline maps or having a dedicated GPS Cycling Computer (like a Garmin or Wahoo) is safer and saves your phone battery for emergencies.
Never ride without ID.
If the worst happens and you are involved in an accident where you cannot speak for yourself, first responders need to know who you are and if you have critical medical conditions.
A simple laminated card with emergency contacts or a Road ID Bracelet is invaluable.
Furthermore, carry physical cash. Sometimes electronic payments fail, small rural convenience stores don't take Apple Pay, or you need to boot a ruined tire.
An emergency $20 bill can actually be used to boot a tire. If you slash your tire sidewall, folding up a dollar bill and placing it inside the tire between the casing and the tube can prevent the tube from bulging out and exploding, allowing you to limp home.
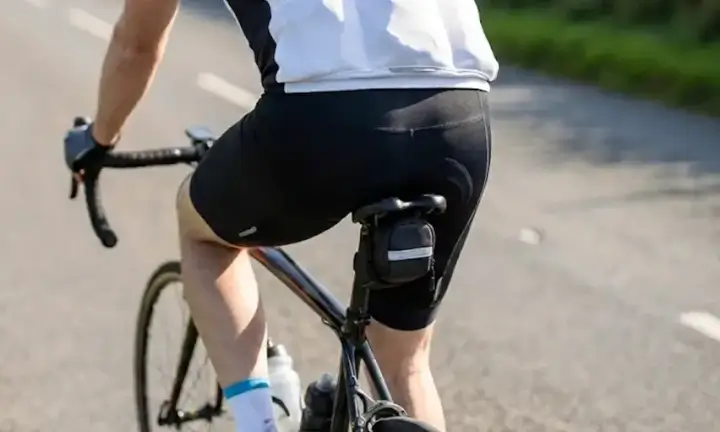
By now, this list sounds like a lot of gear. You might be wondering if you need a backpack. You generally do not. The goal is to keep the weight on the bike, not on your back.
The most common solution is a Saddle Bag (or seat bag) that tucks neatly under your bicycle seat. These come in various sizes. A medium-sized bag can easily hold a tube, levers, multitool, CO2, and quick link. It stays on your bike permanently, so you never forget your kit.
Another popular trend, especially in gravel riding, is the Handlebar Bag.
These look like small burritos strapped to your bars and are excellent for carrying extra food, your phone, and layers like a wind vest.
Your jersey pockets are best for things you need quick access to while riding: food, phone, and perhaps your mini-pump if it doesn't fit in the saddlebag.
Spreading the load keeps the bike looking clean and the rider comfortable.
Looking at this list, it might seem burdensome to carry these items on every ride.
It is tempting to look at the blue sky, feel the lightness of the bike, and think, "I'll just go for a quick hour, nothing will happen."
The reality of cycling is that mechanicals rarely happen at convenient times.
They happen when it's raining, when you are furthest from home, or when you are already late for dinner. The gear listed above is not a burden; it is an insurance policy
It transforms a potential crisis into a minor inconvenience, a story to tell later rather than a desperate plea for a ride.
Pack your kit, know how to use it, and enjoy the ride knowing you are self-reliant.
Perfect for the new riders!
No spam. Cancel anytime.


